
How to use Audio tracks & editing
Put recordings, backing tracks and stems next to your tab
Available
Audio lanes sit under the tracks of a tab and play in time with its notes. Add a backing track, a recording of your band or the stems of a song, then move, trim, split and fade the clips and sync the audio to the bars. This guide walks through every screen.
Before you start
- Smart Beat 1.3.0 or later.
- A tab, and an audio file as an MP3, M4A, WAV, FLAC, OGG or AIFF file that you have the rights to use, such as your own band’s recording or the stems of a song.
- To record a take, a microphone or an audio interface.
Open a tab and find the Tracks panel
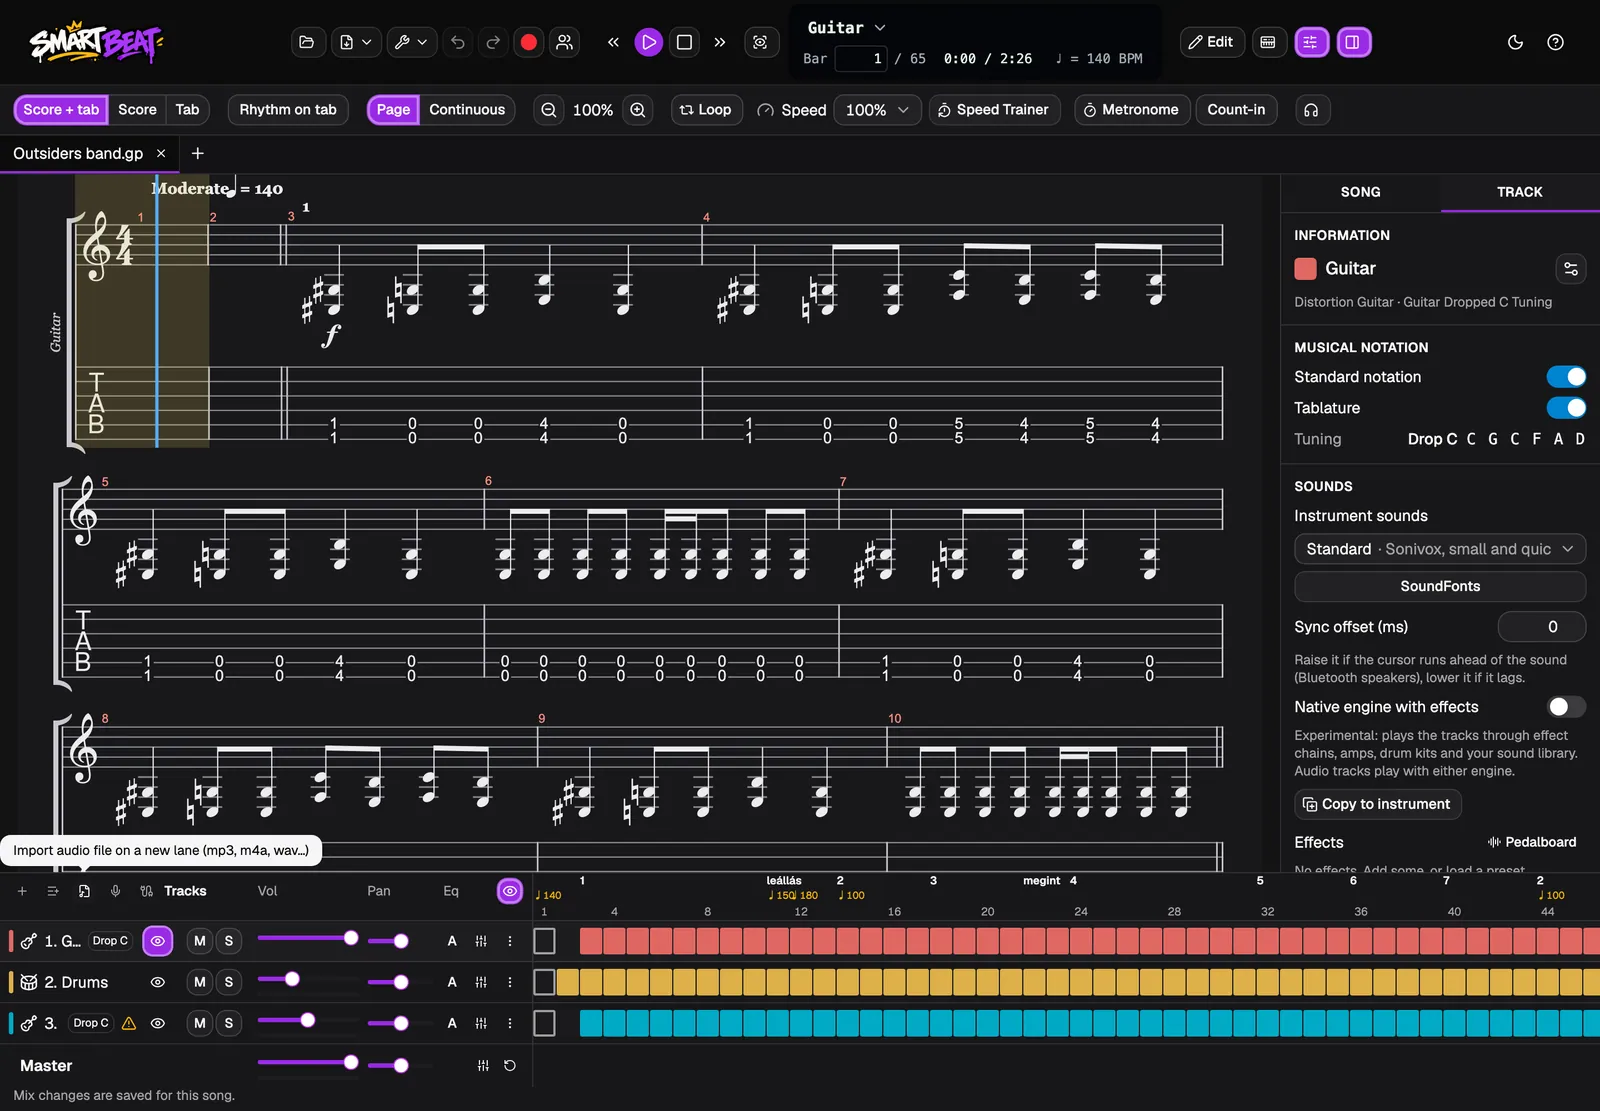
Open the tab you want to play along with. The Tracks panel under the score lists the tracks of the tab. Audio goes on lanes in the same list, right under the tracks, so a recording lines up with the bars it belongs to.
The buttons at the top of the panel add things: Add track, New audio lane, Import audio, Record audio and Add monitor track. Point at one to read what it does.
- If you cannot see the Tracks panel, switch it on with the Mixer button in the toolbar.
Import an audio file
Click Import audio and choose a file: a backing track, a recording of your band, a click track. MP3, M4A, WAV, FLAC, OGG and AIFF files work. You can also use Track › Import Audio in the menu bar.
The file arrives on a new audio lane of its own, with its waveform, starting at the first bar. Press Play: the notes and the audio play together, in time. You do not need to switch the sound engine for that.
- A tab holds up to 16 audio lanes.
Drop more files on a lane
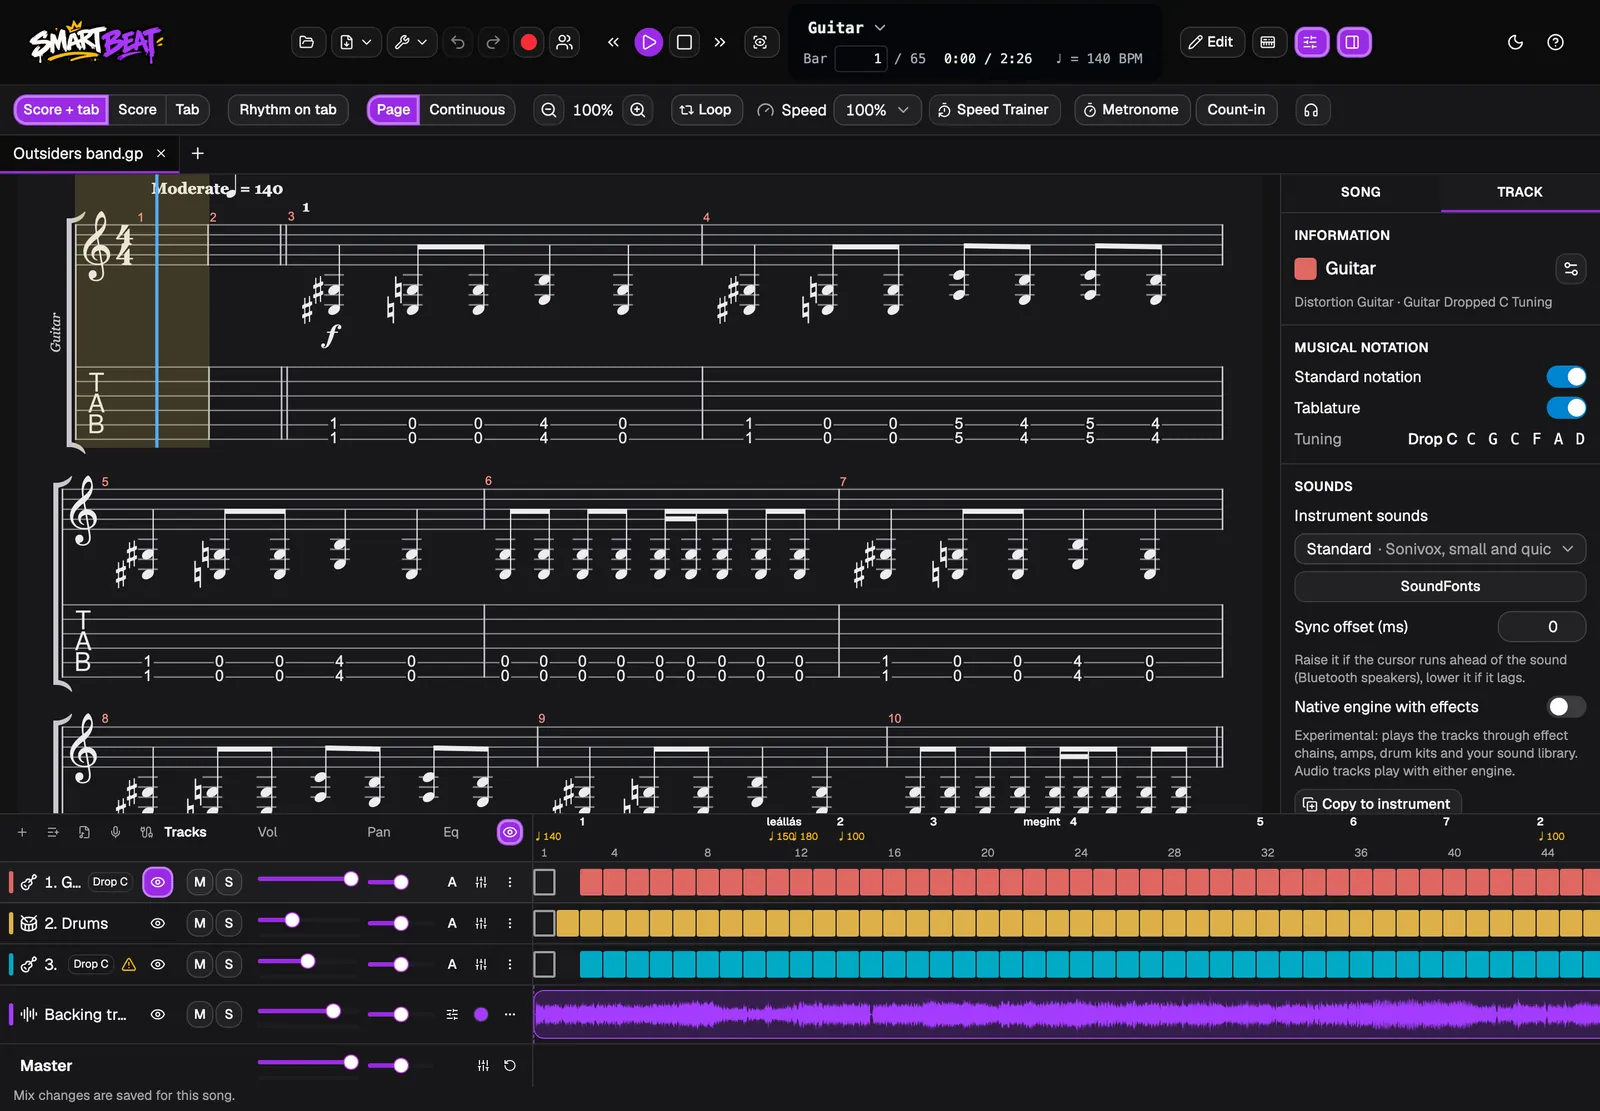
You can also drag audio files from the Finder or Explorer onto the window. While you drag, Smart Beat says where the file will go: drop it on a lane to add it there, at the point under the pointer, or anywhere else to start a new lane.
Several files dropped on one lane follow each other. Several files dropped elsewhere get a lane each.
Open the lane editor
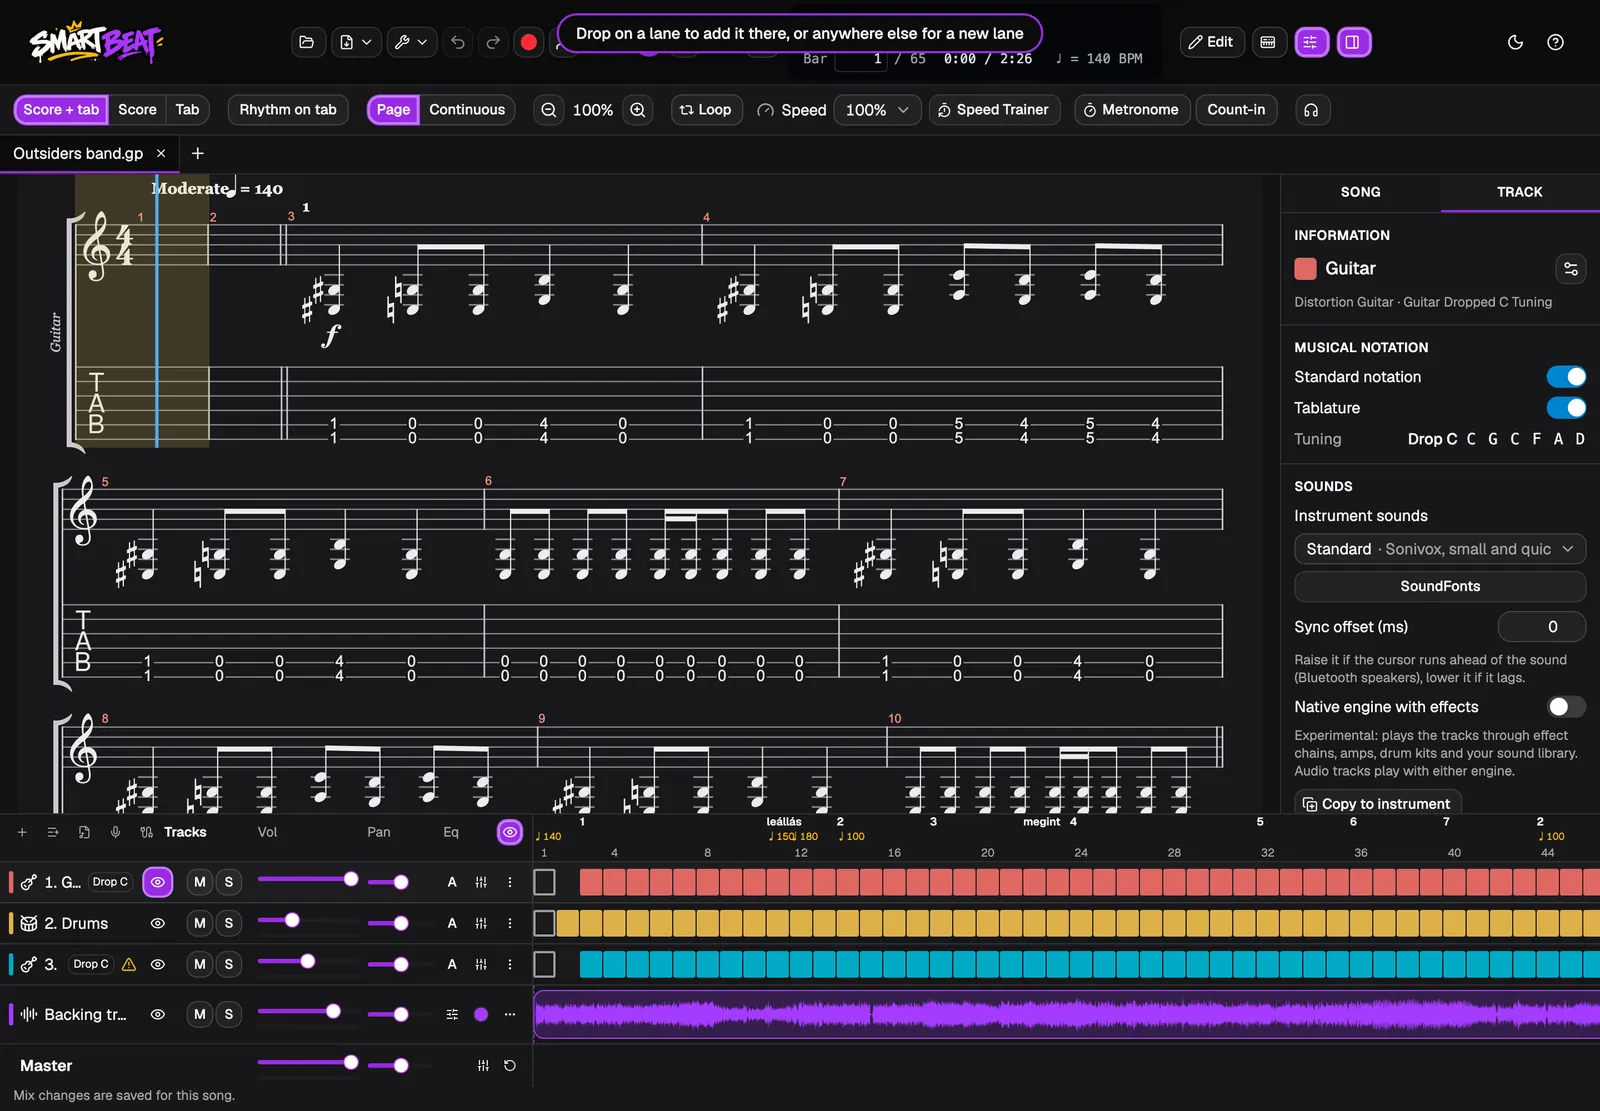
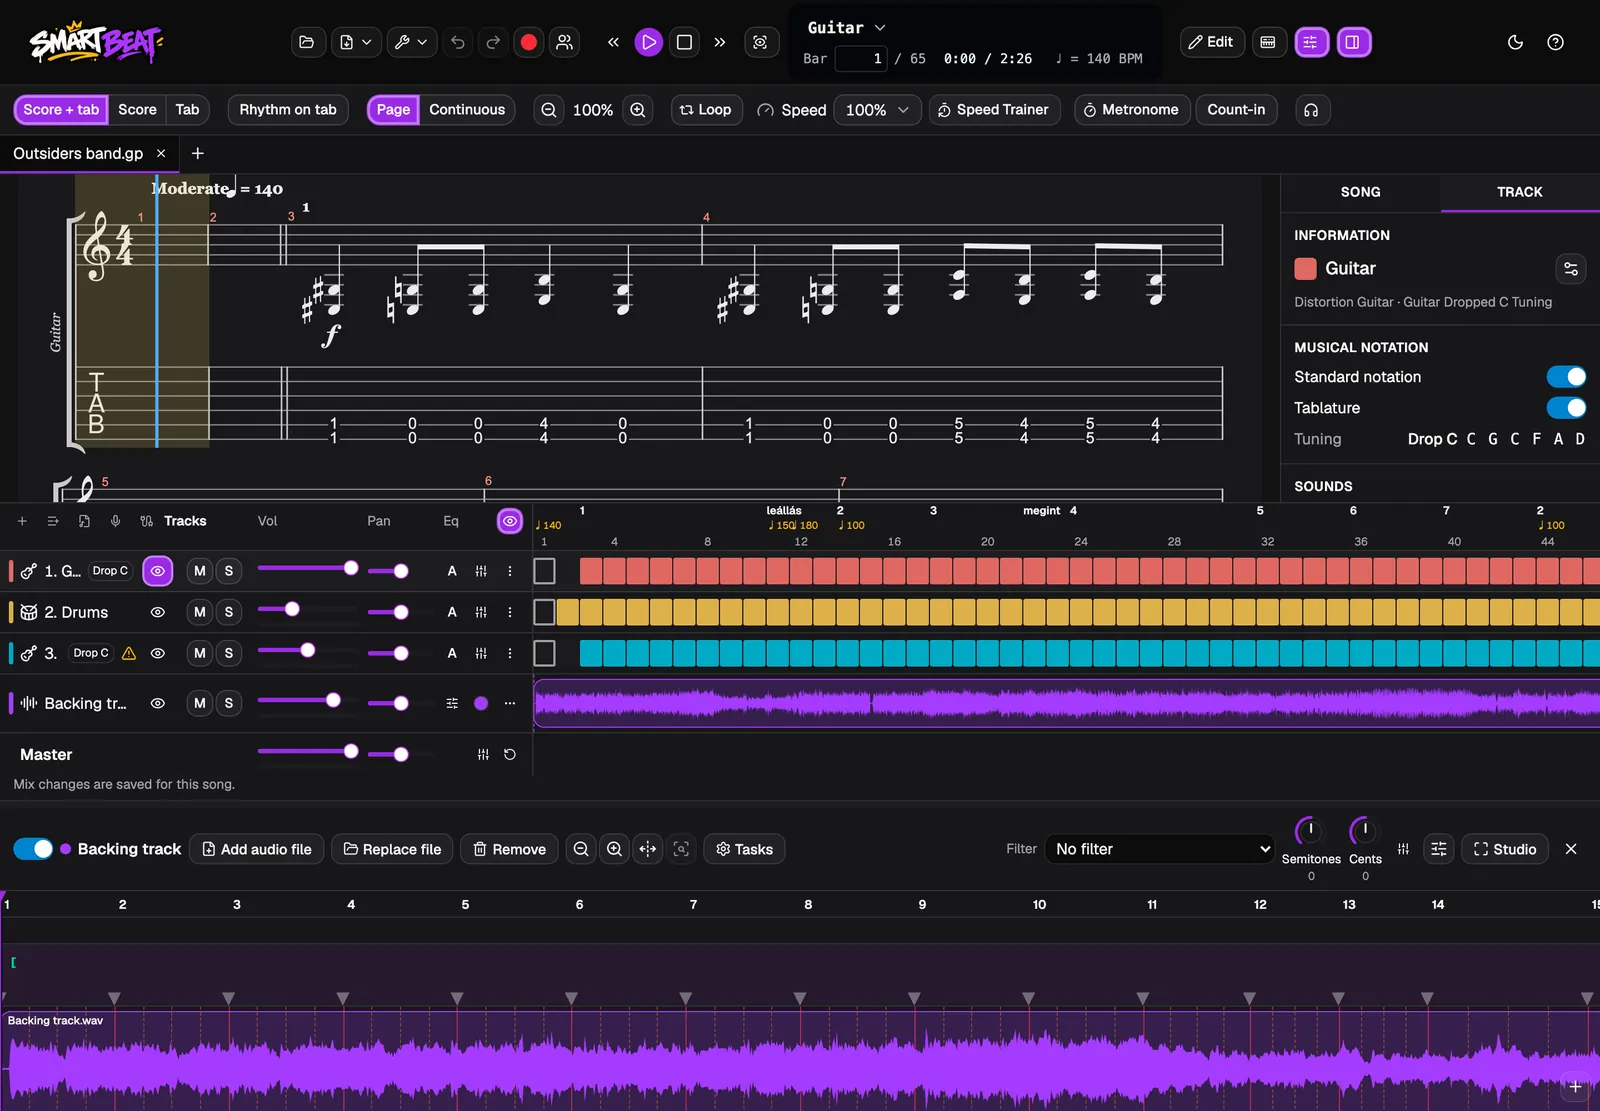
Click a lane’s name in the track list, or its ··· button and Open the lane editor. The lane editor opens under the track list and shows the lane’s clips on a time line, with the bars of the tab above them.
Its bar has what you need for that lane: Add audio file adds another clip after the last one, Replace file swaps the audio, Remove takes the lane away, and the zoom buttons make the waveform bigger. Filter, Semitones and Cents change the sound of the whole lane, for example to play a recording in another key.
Move, trim, split and fade clips
A lane holds clips. Drag a clip to move it, drag its edges to trim it, and use the editor tools to split it where the playhead is, glue clips together, duplicate them or fade them in and out. Clips snap to the beat so they stay in time.
Click a clip to select it. Its properties, such as gain, pitch, fade in and out, Mute, Lock and Reverse, are in the Studio (step 8). Several clips can be selected and changed at once.
- Undo and Redo take back every audio edit, one step at a time.
Sync the audio to the score
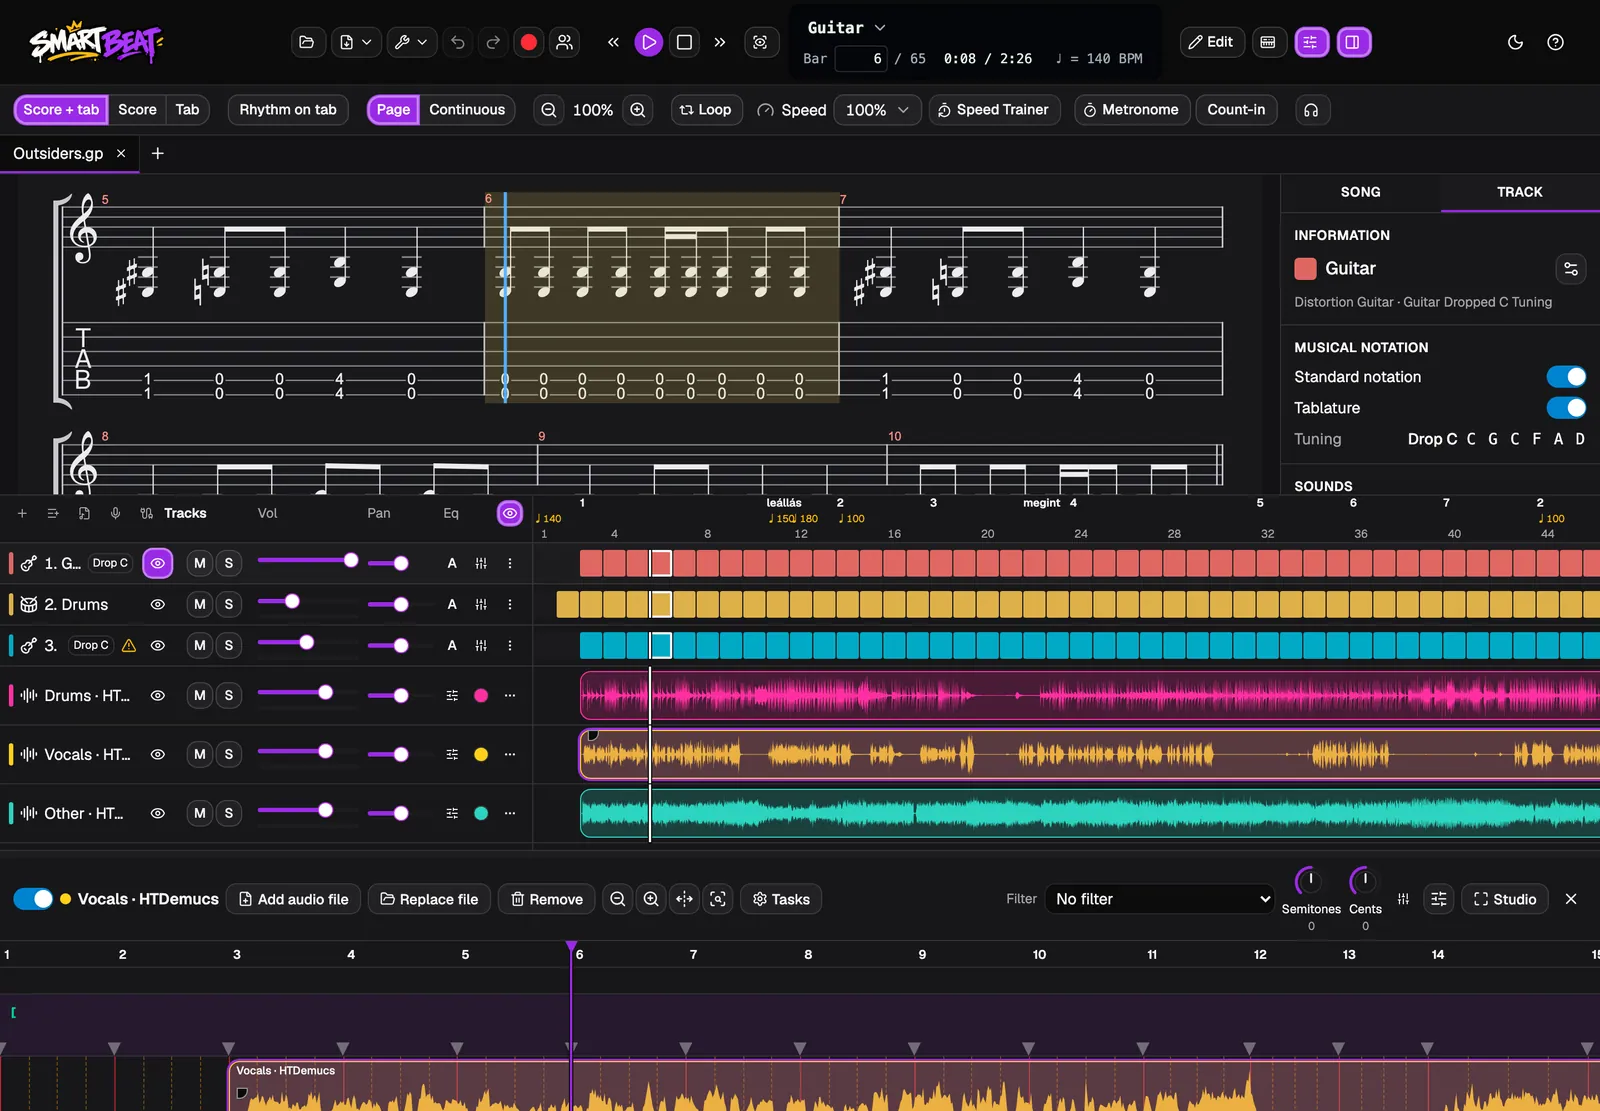
A recording of a real band does not always keep the tempo of the tab. Sync points tie a place in the audio to a bar of the tab, so the audio follows the bars even when the band speeds up or slows down.
Open Tasks in the lane editor. Under Sync you can make sync points from the tempo changes of the score, make them from beats Smart Beat detects in the audio, turn the sync points into tempo changes of the score, or clear them.
Under Files, Embed puts the audio inside the tab’s file and Extract saves a copy of it as a file again.
Name, colour and arrange the lanes
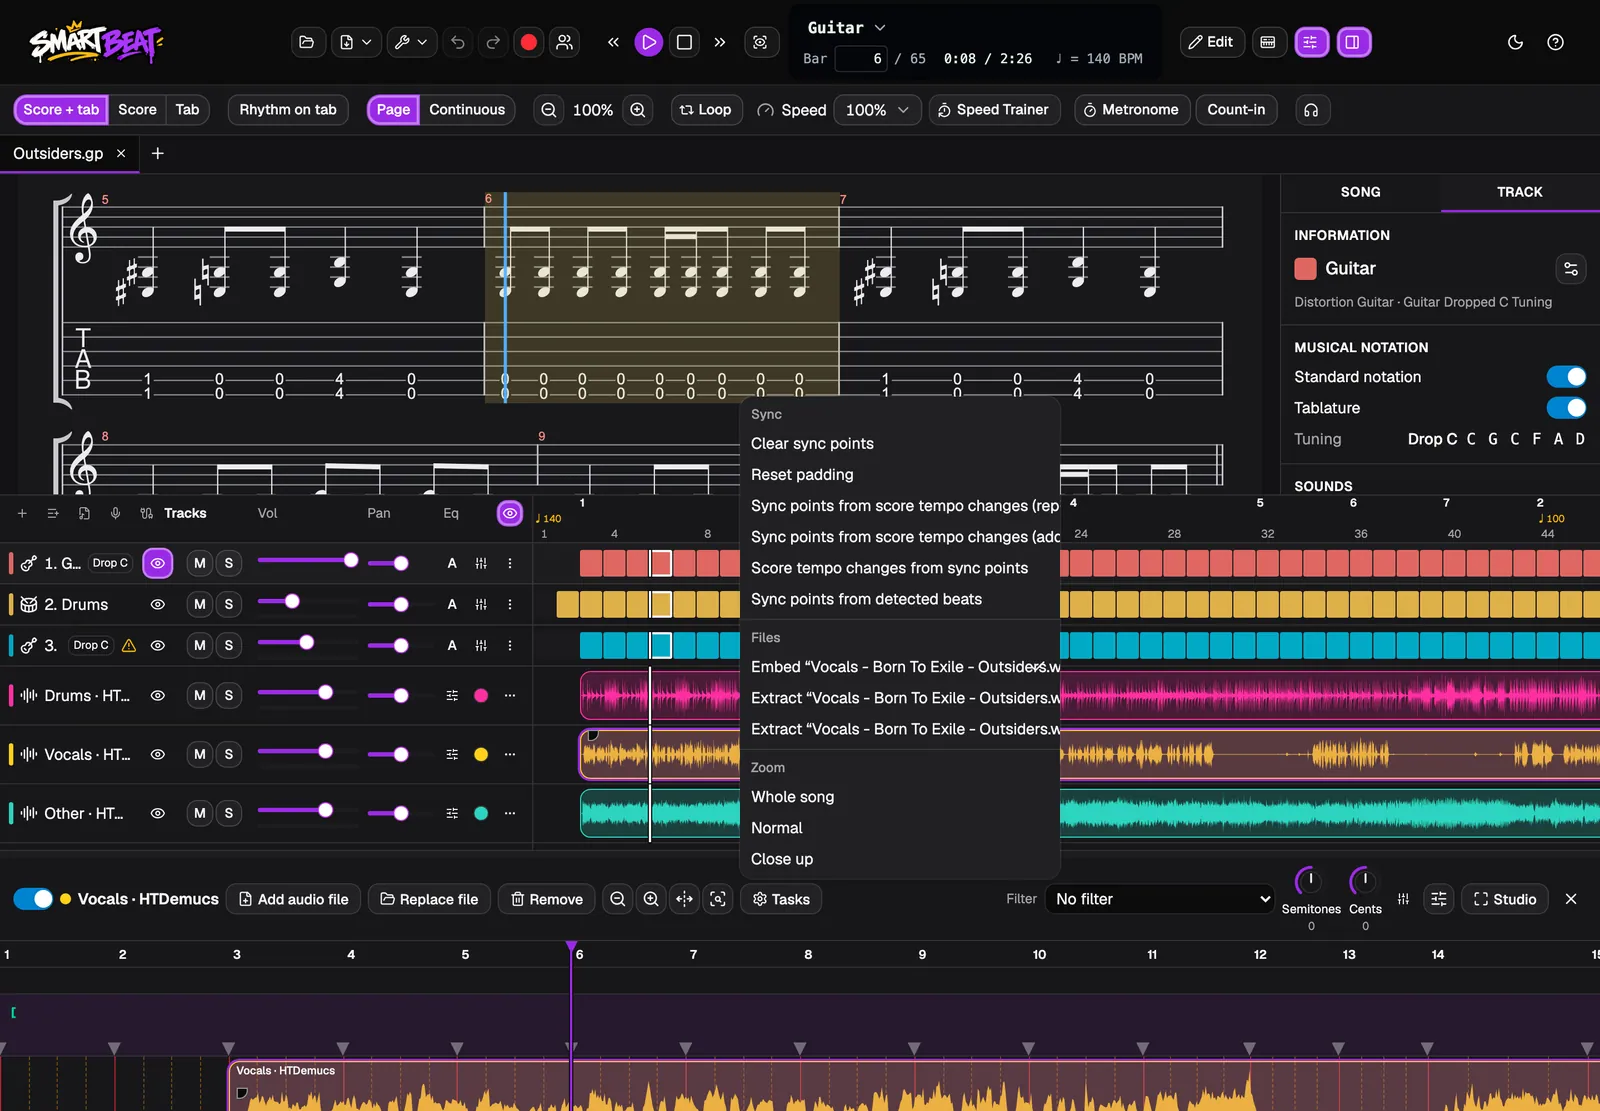
Every lane has its own volume, pan, mute and solo in the track list, and a coloured dot that opens its colour. Stems keep their stem colours by default.
The ··· button of a lane has Rename, Move up and Move down, Put in a new folder, Join the edit group (lanes in a group are edited together) and Remove lane. Enabled switches a lane off without deleting it.
- Each player of a Practice together session keeps their own volume, pan, mute and solo of a lane.
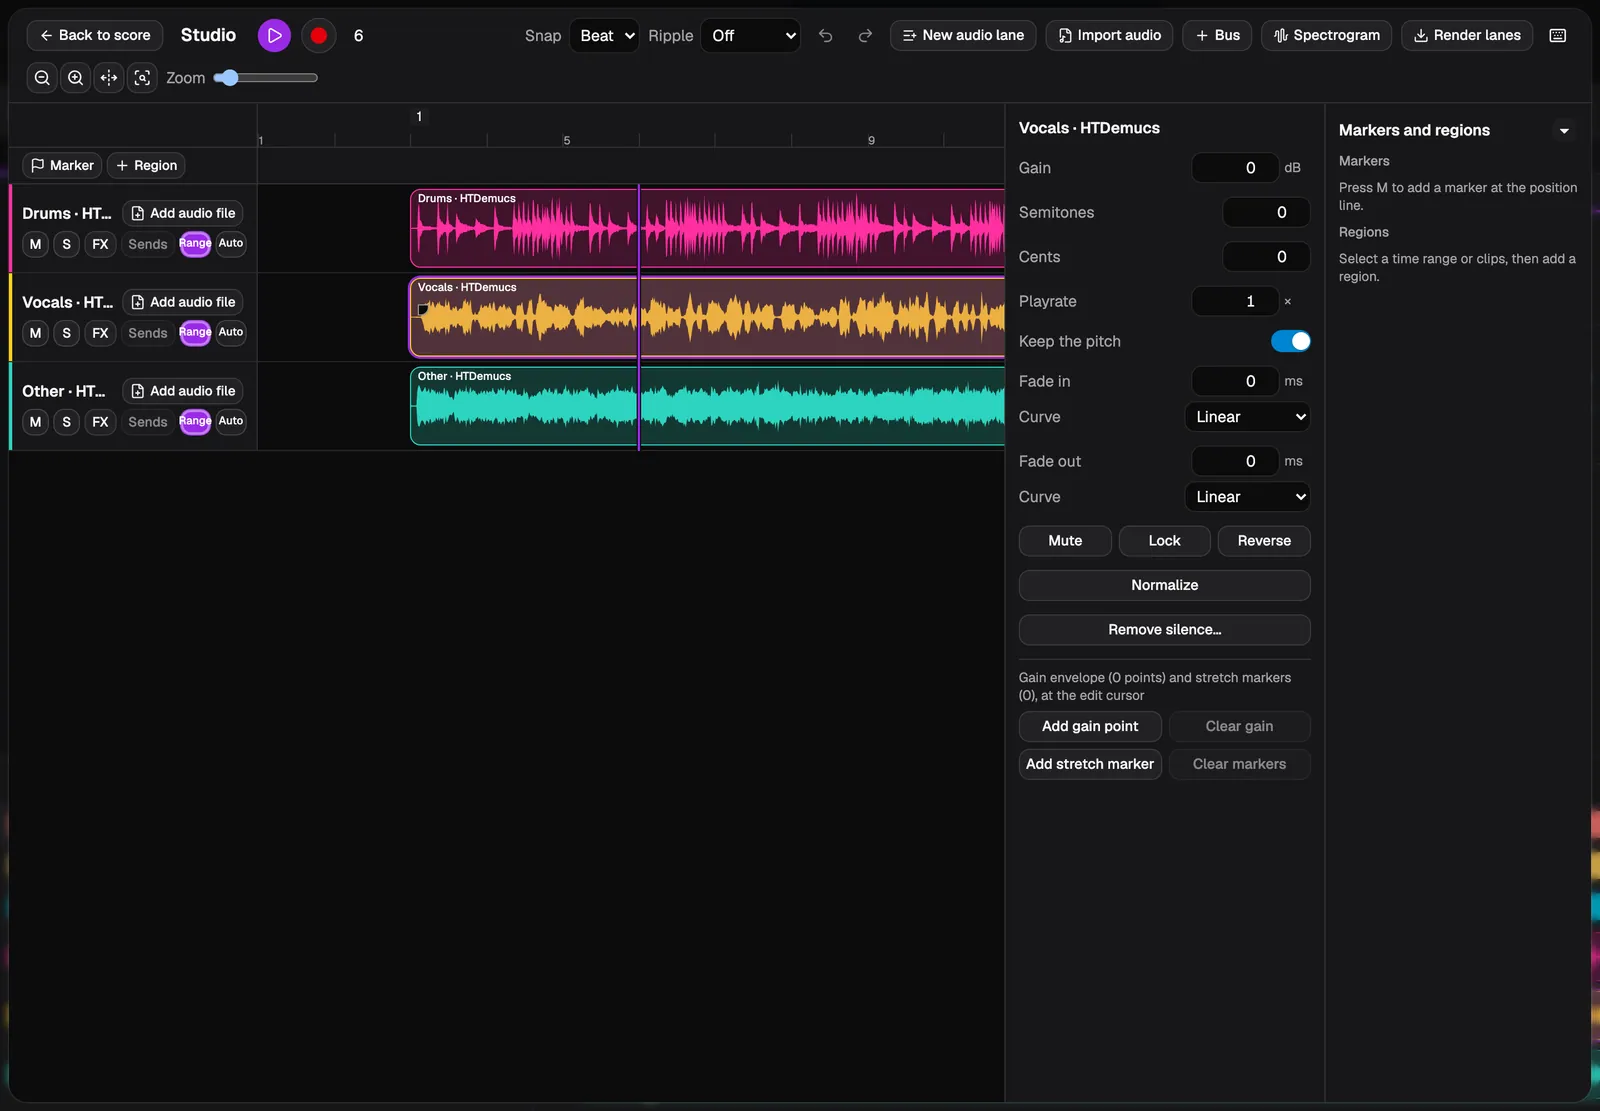
See every lane in the Studio
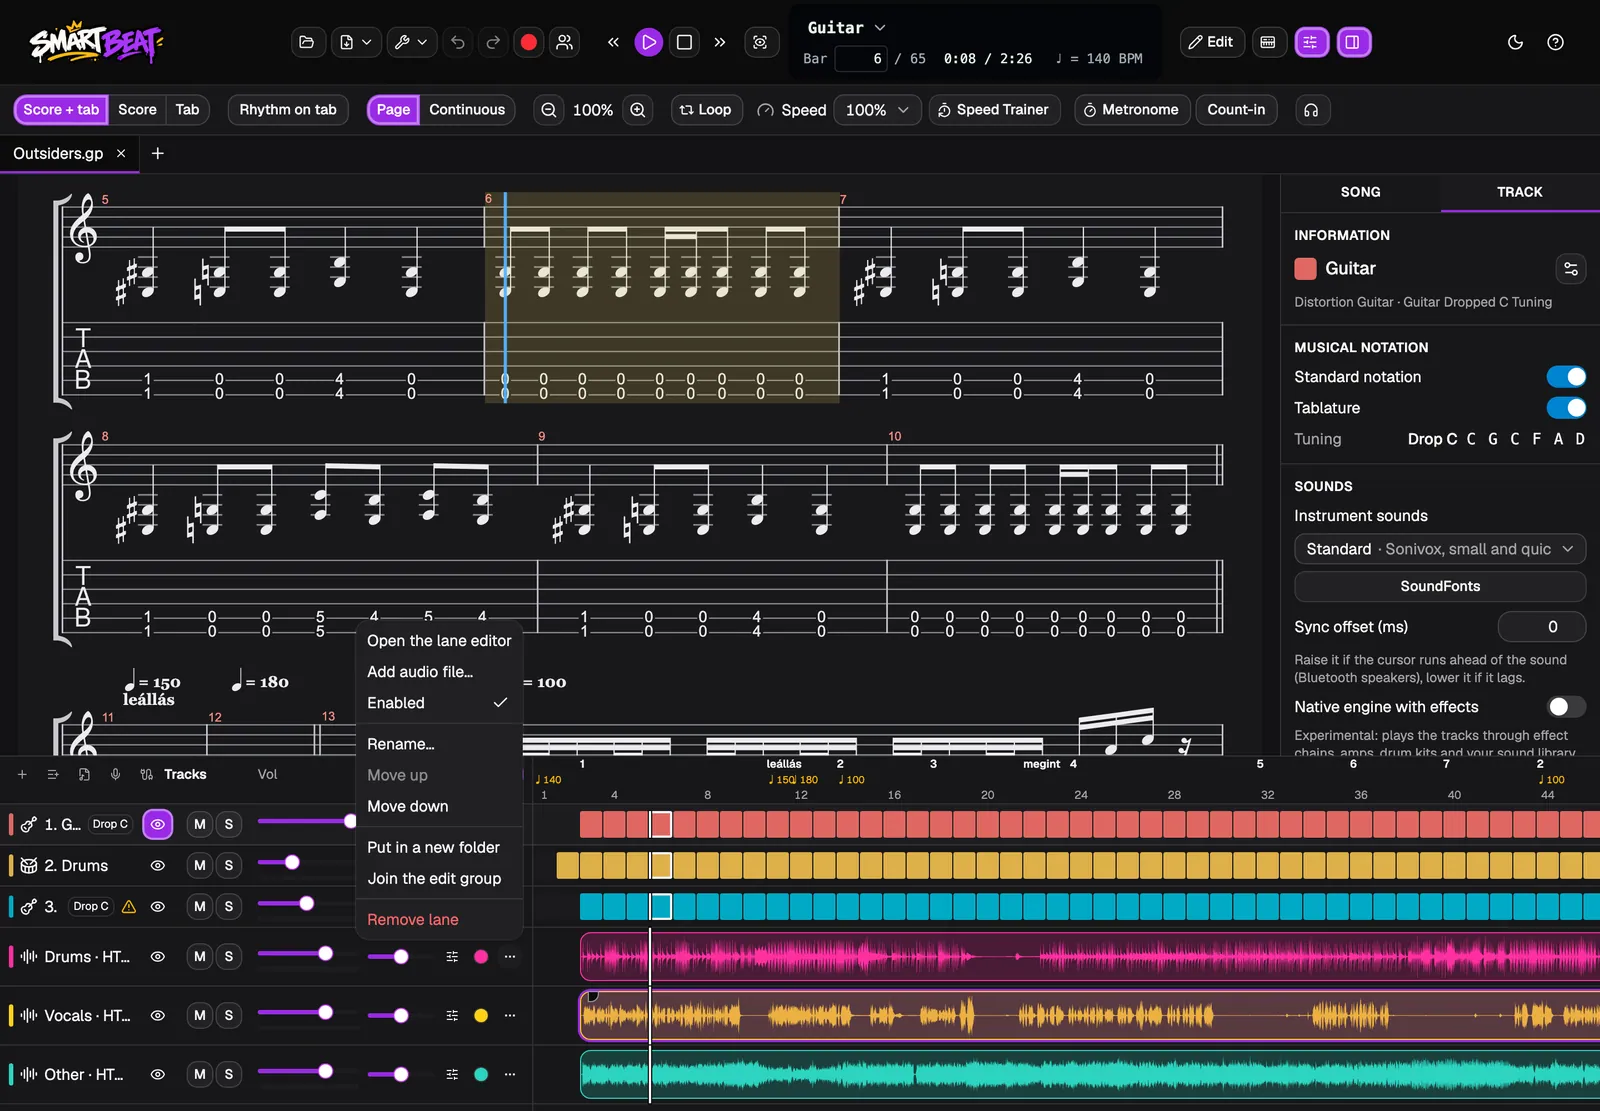
Click Studio in the lane editor to see all lanes at once on a big time line. Here you can set a clip’s gain, pitch, playback rate and fades, mute, lock, reverse or normalise it, remove silence, and draw gain points and stretch markers.
The Studio also has Snap and Ripple, New audio lane, Import audio, Bus, a Spectrogram view, markers and regions, and Render lanes. Click Back to score to return to the tab.
Record a plain take
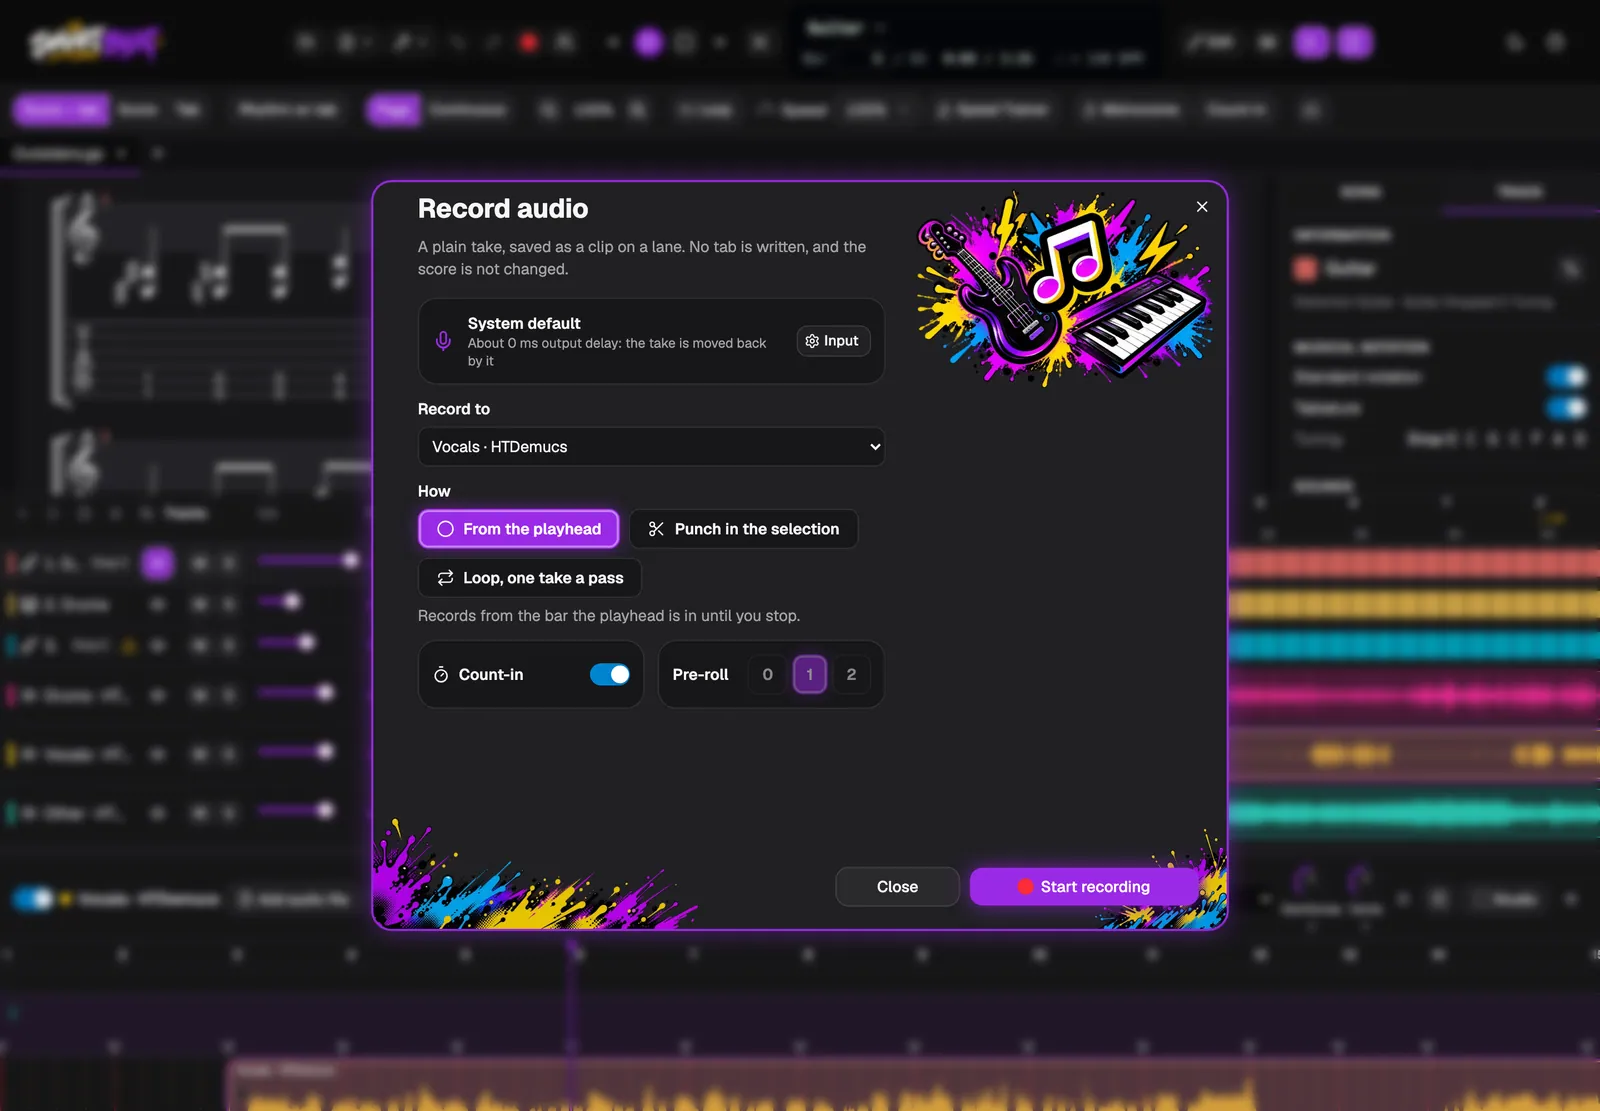
Click Record audio to record yourself playing on a lane. A take is only audio: no tab is written and the score is not changed. If you want tab from a recording, see Record to tab.
Choose where to record to, a lane you have or a new one, and how: From the playhead, Punch in the selection, or Loop, one take a pass. Count-in and Pre-roll give you a bar or two to get ready. Click Start recording.
- Smart Beat asks your computer for the microphone or audio interface. The recording stays on your computer.
Play it and save it
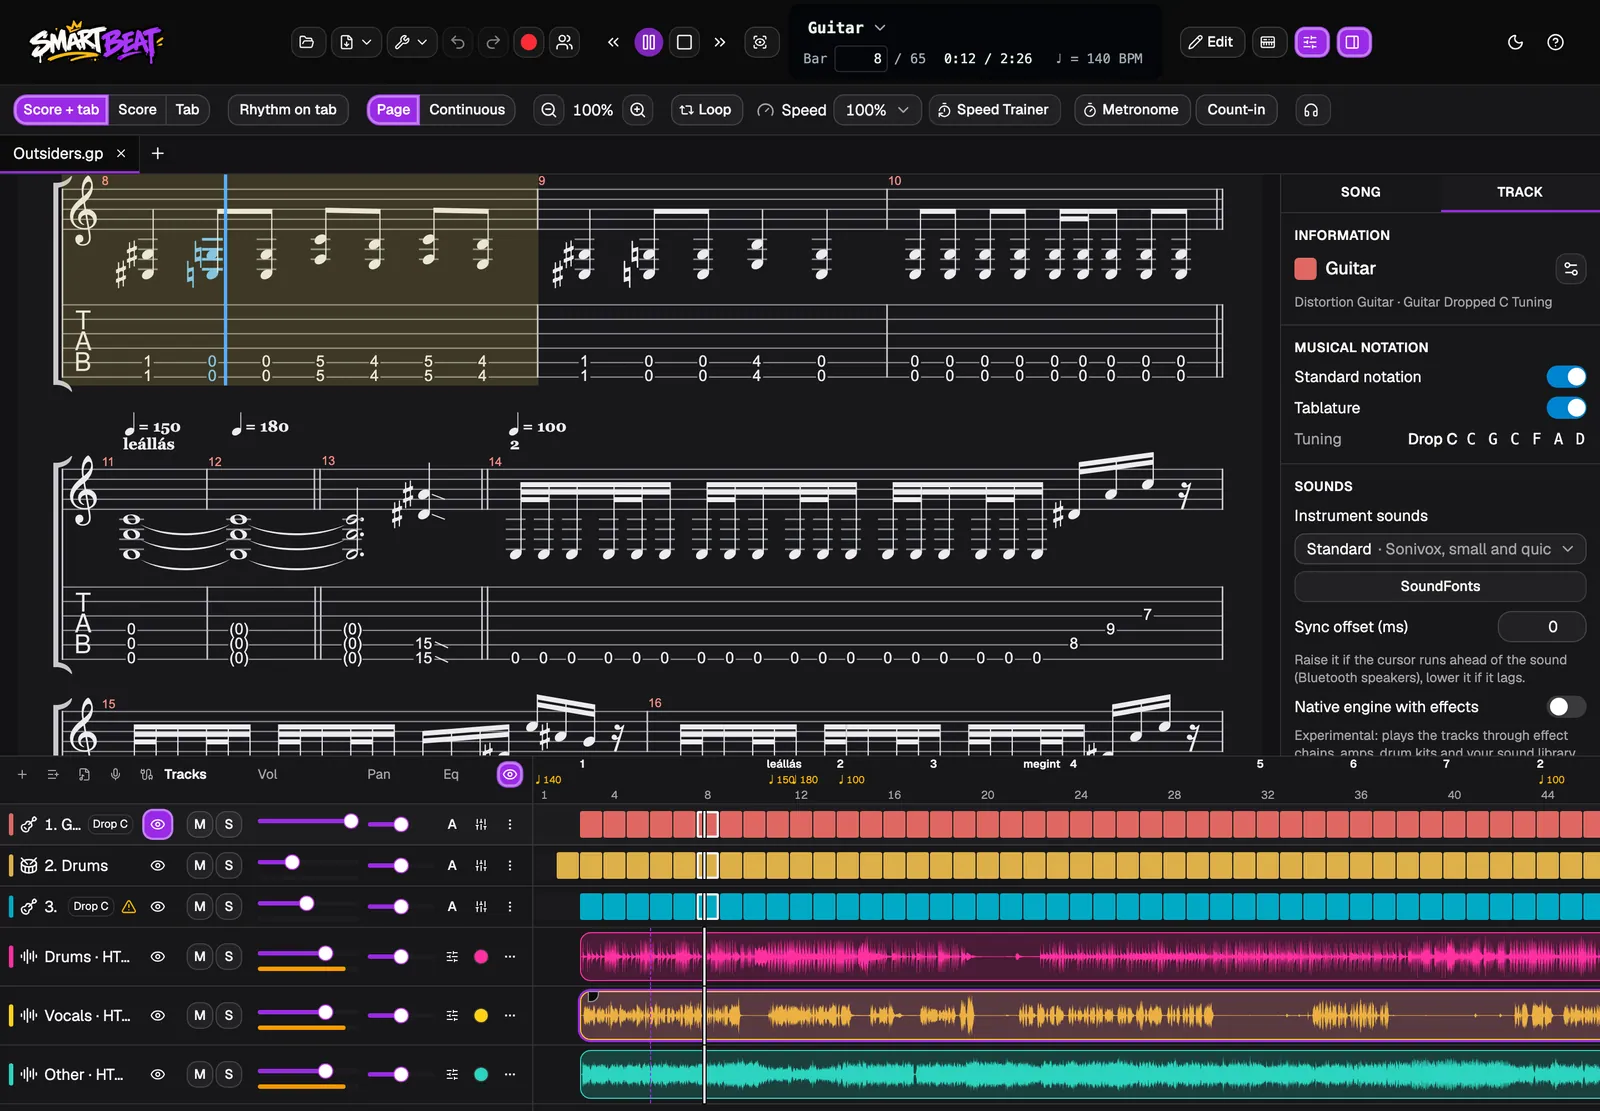
Press Play. A playhead runs through the score and every lane, and the audio stays with the notes. Mute and solo lanes to practise one part against the rest.
Save the tab as usual. The audio is saved inside the tab’s file, so it comes back when you open the tab again, on this computer or another one. A song that had an old backing track opens with it on a lane.
Good to know
- The notes play with the SoundFonts as usual and audio lanes always play next to them. The native sound engine is only needed for effects, amps, drum kits and the monitor track.
- The audio is saved inside the tab’s file, so the file gets bigger with every lane. A tab holds up to 16 audio lanes.
- Undo and Redo cover audio edits. In Practice together, Undo only takes back your own edits.
- In Practice together the lanes and their audio files are shared with the other players, and each player keeps their own mix.
- Stem separation can send the stems of a song straight to lanes of a tab. Read the Stem separation guide for that.
- Only use music you have the rights to.